 |
Step 1: Heat the
negative mold in a warm oven until warm to touch. This step is optional but may
yield a better appliance surface. Remove and apply release (Vaseline dissolved in
Mineral Spirits works good but some use cooking spray). No need to "bake
out" like with Foam Latex. |
 |
Step 2: Apply release
to the Positive side of the mold. It is optional whether this side is heated or
chilled in the freezer prior to foaming. If chilled it should only be cold to the
touch and not frozen. The goal here is only to speed up the gelling time.
Experience will dictate what is appropriate. |
 |
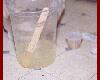
Step 3: Add 3˝
Tsp water to the total contents of "Part B" and stir with the small
stick provided. Do not use the same stick to stir "Part A". Allow
Part B to completely dissolve for at least 2 minutes. The longer
the better. |
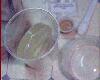 |
Step 4: Remove Part A
from its container and place it in the large container provided. Melt the Gelatin
Base (Part A) in a microwave oven for no more than 1.5 - 2 minutes.
Do not overheat (boil). It is better to remove early and allow the unmelted part to
slowly dissolve while stirring. |
 |
Step 5: MOST
IMPORTANT. Allow the melted gelatin to cool for between 5 - 10 minutes
depending on the melted temperature, until the gelatin is only warm to the touch but not
gelled yet. The hotter the gelatin is when it is foamed the more translucent the
foam will be but it will have a coarser and uneven cell structure with heavier body. |
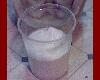 |
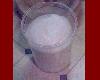
Step 6: Add the
dissolved Part B to Part A while stirring. It will immediately begin to foam.
Stop stirring at this point and allow the foam to rise. |
 |
Allow it to rise without
stirring until it has stopped rising. |
 |
It will continue to rise
until almost a quart of foam but this foam is unstable and needs to be refined. |
 |
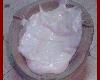
Step 7: Once it has
stopped, stir the foam to refine the large bubbles until an even cell structure is
reached. It should be at a Meringue consistency. It is possible to reheat the
foam to allow the foam to pour into a mold or to inject. Some do this anyway and
claim a much better foam. They heat for about 30 seconds only and stir again. |
 |
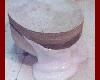
Step 8: Load your
molds. Spatulate the foam into the warm negative mold and close immediately.
This step is the same as for Foam Latex. Be careful not to trap large air bubbles.
You can also inject the foam but the mold needs to be warm. |
 |
Step 9: Close the molds
immediately after filling and either clamp or stand on the molds to insure a thin blending
edge. Place the closed molds into a freezer to gel. Depending on the size of
the mold and its temperature it will take between 30 minutes to an hour before you can
remove the appliance. The longer the better but still faster than baking Foam Latex. |
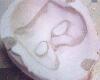 |
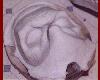
Step 10: You can tell
that the foam has gelled the same way that you tell if Foam Latex has gelled. Poke
the runoff and if the runoff bounces back its ready. Remove the mold from the
freezer and peel the flashing from the outside of the mold. This will keep the foam
from sticking to the mold while opening. A screwdriver will help in the initial
opening but it should be done slowly in much the same way a Foam Latex mold is opened.
Once open, powder the inside of the appliance. |
|
|
 |
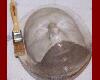
Remove the appliance from the
negative and place it back on the positive. Powder it and it is ready for either
application or prepainting with our Silicolor
and Airbrush
Grade Prosthetic Cosmetic. For application we recommend Spirit Gum as the adhesive and
to inhibit perspiration, we recommend our Sweat Stop topical
antiperspirant / astringent. |
|